Saturday, June 22, 2013

Oil Leak from Crankcase (Kickstand Side)

A few months ago, I noticed oil accumulating near where the shift linkage attachment sits on the stator case.  It was a very slow leak, barely noticeable 'til I cleaned my bike after a muddy ride.  Days later, the leak got worse and I realized it's coming from the seam on the stator case. I knew a gasket replacement was going to be the way to go.  I ordered the OEM gasket, and bought some sealant remover, gasket sealant from NAPA and picked up some wire brushes and rags at a dollar store spending around $20 for everything.


Stator case opened.

Removing one case is not as simple as it seems.  The oil has to be drained, the kickstand has to be removed as well as parts of the shift linkage and rear brake.  I propped up some 2X4's on the other side to hold the bike up.  Too poor or too lazy to get a proper stand.

When removing the rear brake linkage, make note of where the dot marker is relative to the gap, it has to go back in the exact spot.


Removing all other obstructions, no matter how small, helps out a lot in saving time when complications arise.

The case is held on by a magnet (little shaft on the bottom right) so care has to be taken during removal.  I used a rubber mallet to pry it off gently. 

Using the gasket trace to keep the bolts in order


The bolts that hold the stator case open are of several different lengths, so to keep everything in order, I traced the new gasket on the cardboard it came in, including the bolt holes where I made a cross cut in each.  As I removed each bolt I just stuck it onto the cardboard. 

Milky residue in crankase from water mixing with oil

The importance of not letting a leak like this go by for long is the potential damage it can do.   The problem is that water can get in your system and cause problems.  When oil gets contaminated, it doesn't get to do its job properly which is lubricate engine components, cool them off, reduce friction, etc.  


More residue to clean off.  Note the black rubber looking material the residue is sitting on, that's the old, tough-as-nails gasket which is a troublesome part to remove.


I cleaned out my crankcase with some rags, Qtips, and a second oil change after.


Rust 


Moisture seeped into the stator case and caused the shaft to rust.  I cleaned that off with a wire brush or detailing brush as some would call it. 

Rust cleaned off


The hardest and most tedious part was removing the old gasket.  That thing melted onto the case and was a tough SOB to scrape off. 

I could've used some more aggressive methods but I didn't want to damage the case and I needed a nice even finish to get a good seal.  It took hours off applying gasket remover, waiting, then scraping with a putty knife and wire brush to get all the material off. 

Mating surface area (edges) cleaned

Surface area cleaned and ready for new gasket

Gasket sealant applied minimally

I used a very thin layer of gasket sealant on both sides, nothing fancy, just used my fingers to smooth it over the mating surfaces.  I placed the new gasket on the stator side and then mounted the stator back onto the crankcase.  The gasket isn't a super perfect fit, at the bottom just a slight bit of gasket sticks out once the surfaces are mated.

The repair did the job. No more leak, but I still don't know why the seal failed in the first place, which is why I opted for the gasket sealant.  The only thing I did differently was use Rotella T6 Synthetic 5W40 oil which I started a couple of months before this problem happened.

If you have had the same problem, know why the gasket failed, or if you have tips on how I can save some trouble next time, let me know!  Hope this helps somebody out. 

I recently added the GAK mod so I'll be posting about that soon.

Sunday, October 7, 2012

Carburetor Re-Jet and Sync

Now to discuss re-jetting the carbs. This is a touchy topic because there's a lot of differing opinions on carb re-jet.  A change to your exhaust or intake system usually calls for one, but a change that's not too drastic might not need a re-jet, just a sync. I decided to go ahead with the re-jet since I plan on modifying the intake later on anyways.  What a pain in the a$$!!

I referred to 650 CCN&D's Re-Jet How To for instructions on some parts.

You need an army of tools for this one: wrenches, sockets, screwdrivers, allen keys, pliers, and a drill with preferably smaller drill bits. I also had to buy an extractor to get the carb screws out.

This is the first mod that I couldn't finish in a day.  A lot of time was wasted trying to take the carb screws out just by sheer determination and a good pair of vise grips.  Friends, that just isn't enough some times.

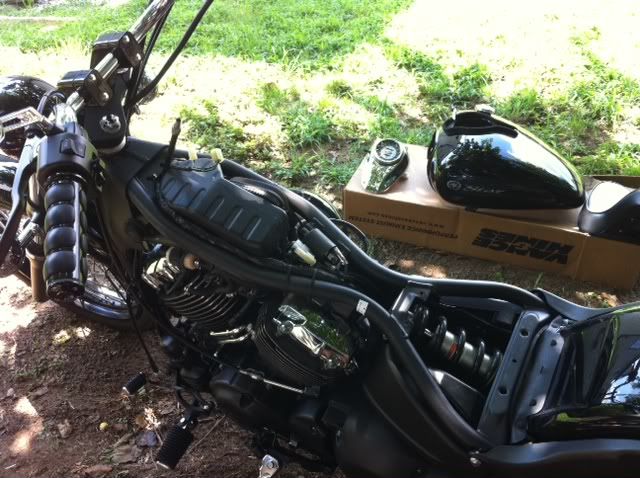
First order was to get to the carbs.  You can check out the Service Manual link for step by step instructions.  The gas tank, air cleaner, breather, and some wires have to be moved out of the way.


Always a good tip to have the tank nearly empty when removing it. It's heavy!


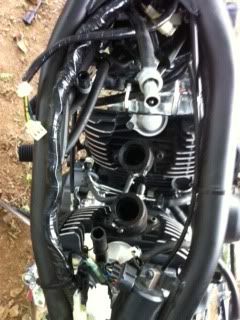
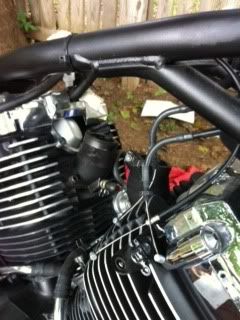
Carefully removing all hoses and wires snaking around...


Then we come to the tedious part of this project.  Many V-Star owners curse whoever made the choice to put such soft screws that easily strip to hold together, of all things, your carburetor!  Every imaginable way has been found and attempted to get these inconvenient screws out of the way, nothing short of grinding them down, hammering, whatever it took. 

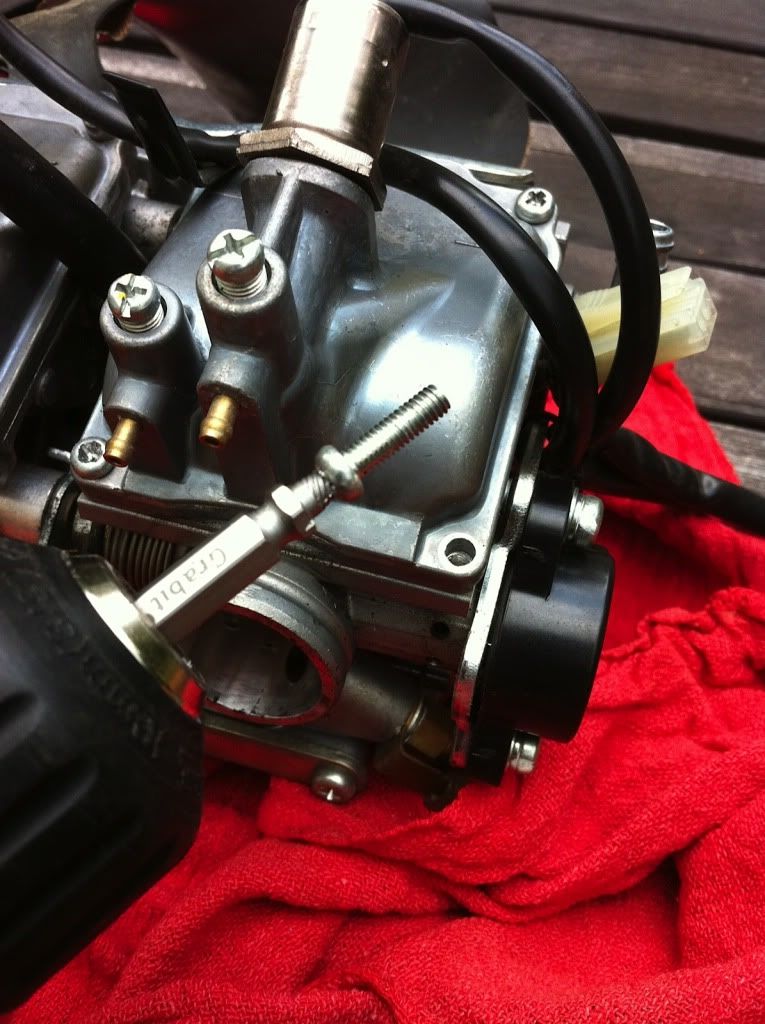
I had completely destroyed the screw heads trying to pry them off with vise grips by the time I took a trip to Lowe's for an extractor.  I settled for a GRABIT extractor thinking it should be okay.  Was I wrong! This thing grabbed the stripped screws easily and I was done in just a few minutes!


The GRABIT Extractor made short work of these
stubborn carb screws

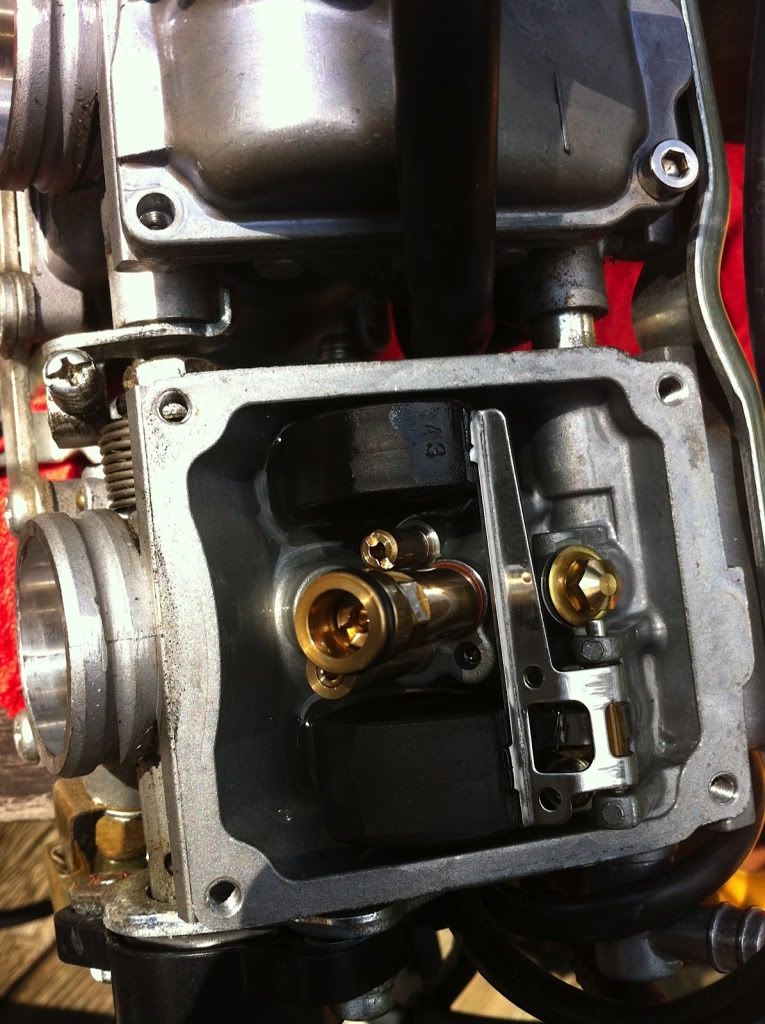
To change out the jets, you need an extremely skinny straight slot screwdriver, nothing complicated on this one.  Screw the old one out, put the new one in, no need to gorilla torque it, just tighten slightly.

The jet should is the one in focus.  After the carb screws are replaced with better ones, 
the jets can be accessed without removing the gas tank, just the carb cover.


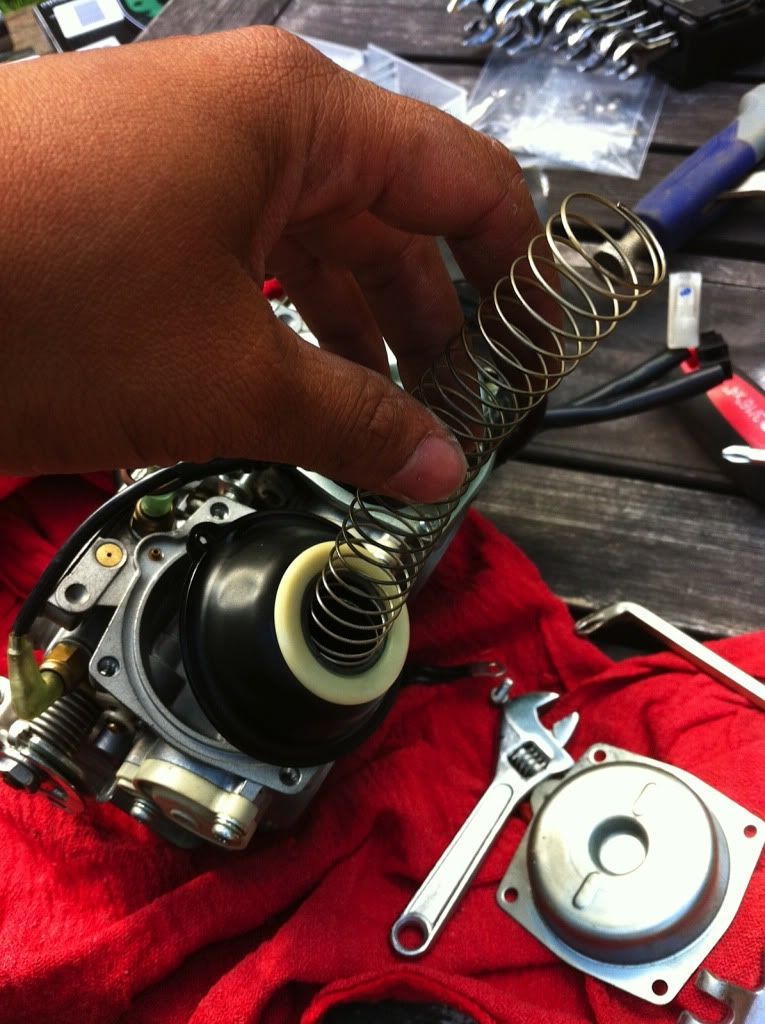
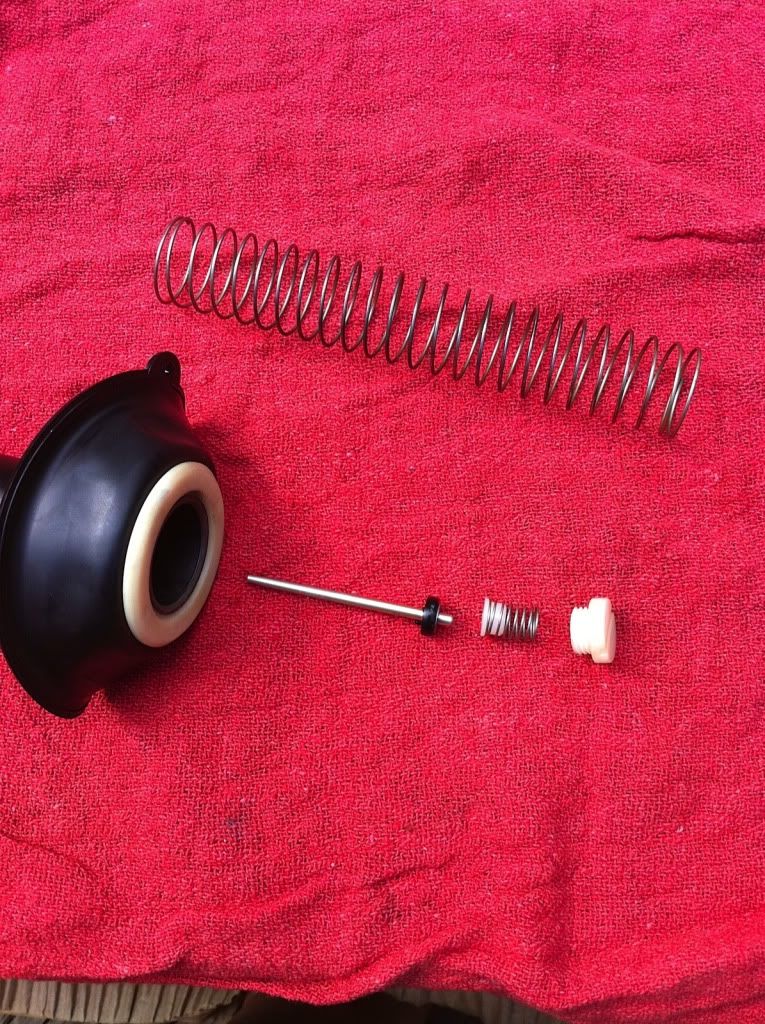
This is the part where you hear a lot of carb talk about needles and shimming. 


The needle has grooves on it and they're counted from the more blunt end.  My mod called for shimming it on the 4th groove so that's where I placed the stock clip on my new needle.  Some people use washers and stack it on the blunt end to get the same effect as placing a clip on the groove.

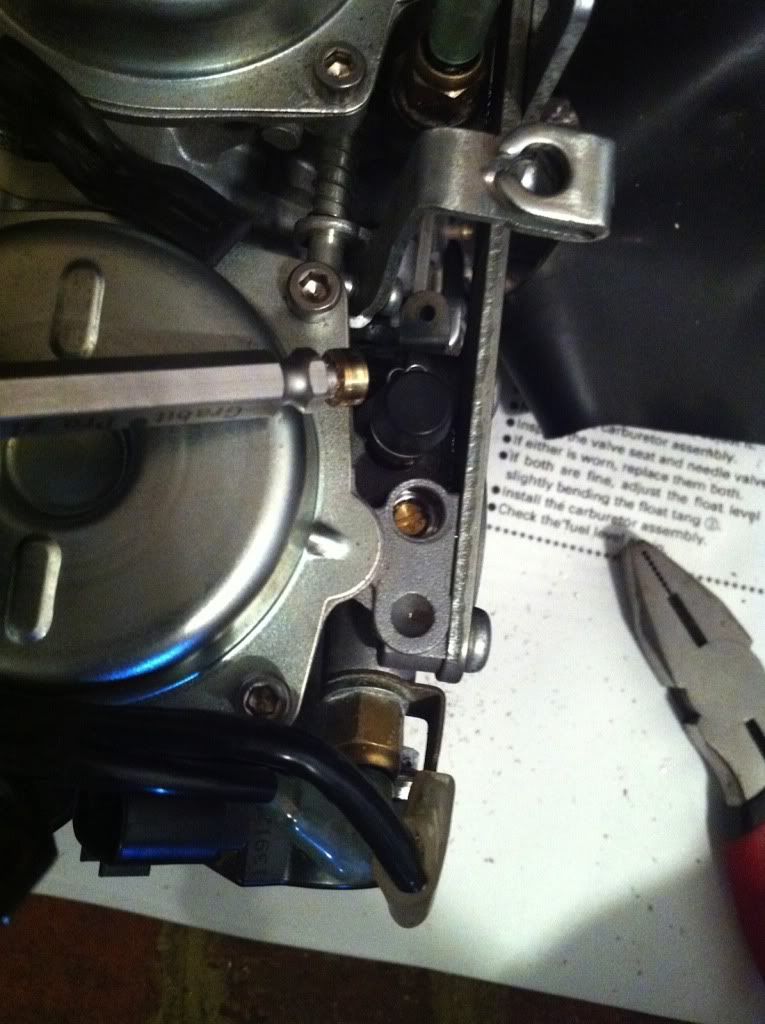
While the carb was opened up, I drilled out the brass plug that covered the PMS screw using the GRABIT again.  This tool is more than worth the money.  A lot of owners have griped about removing this brass plug as well, with some drilling to far and damaging the plastic screw inside.

Removing this brass plug gives you access to the PMS screw.  Mine is backed out
3 1/2 turns.


To get the exact needle shims, PMS screw turns, and right size jets for the pipes you have, checkout 650ccnd.com's Re-Jet Chart. 

Putting everything back together, I used Ziv's Carb Screw Kit which had a handy tool for taking the screws on and off and the right size replacement screws for the ones I demolished.


Vance & Hines Short Shots Exhaust


Hey everyone! It has been a very looooooong while since I posted about my mods so I've got to backtrack a bit and post some old ones that I never did.

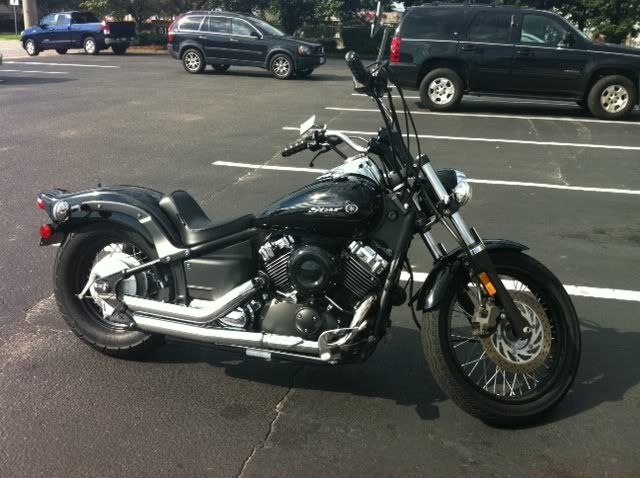
I changed out the stock pipes for some Vance & Hines Shortshots. Purely aesthetic mod but the bike does feel better with the new pipes and a carb re-jet.  If you're thinking of doing this one, buying a new exhaust gasket for the rear pipe is important as the old one looked disgusting when I took it out.  This mod didn't require the header pipe to be removed so that gasket won't be changed out.


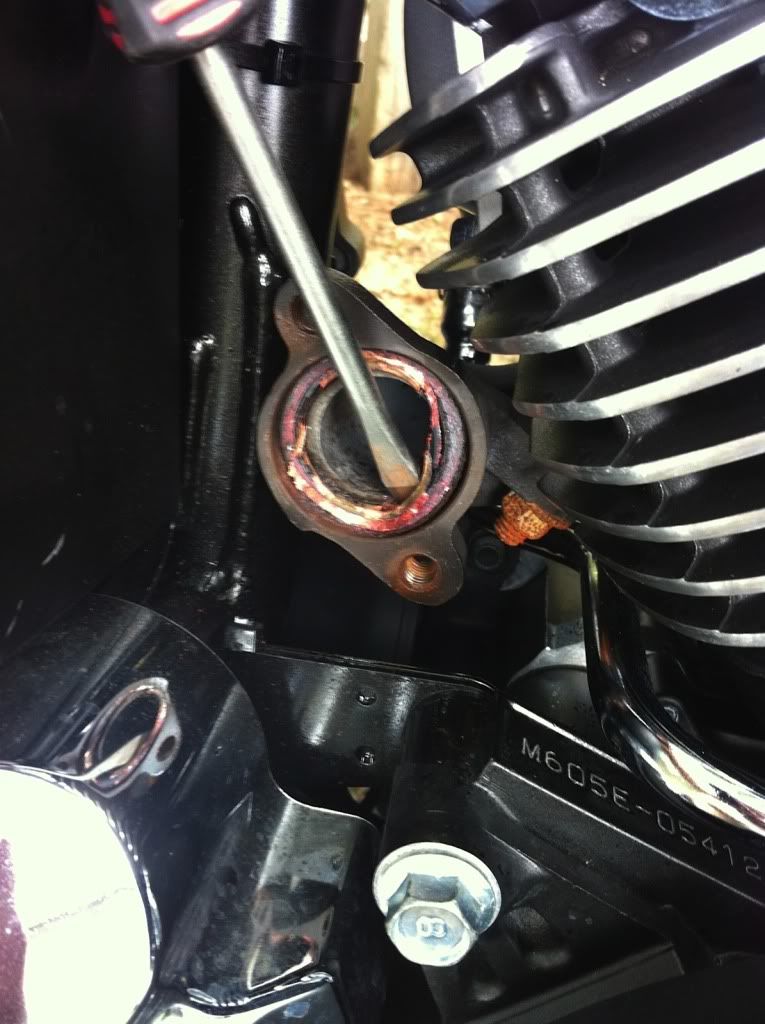
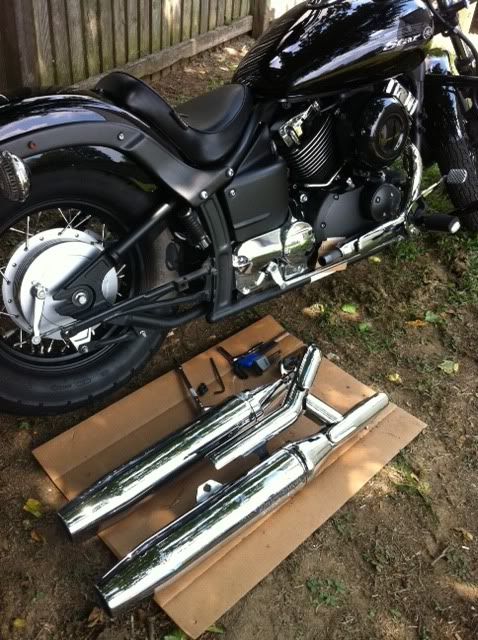
Old pipes being removed. Fairly simple process, a socket wrench, allen wrench, and box end does the job along with a screwdriver. The support assembly also needed to be switched out with the ones shipped with the new pipes.


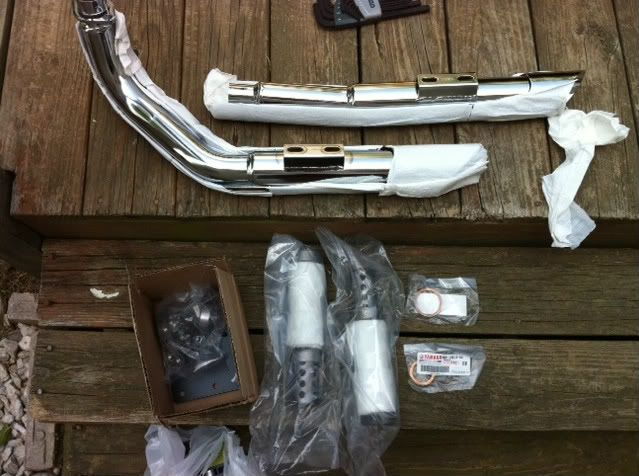
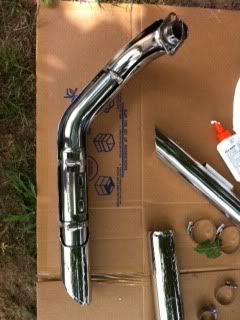
And here's all the materials I had to use: New pipes, quitter baffles, exhaust gaskets, and the jet kit for the carb mod later.


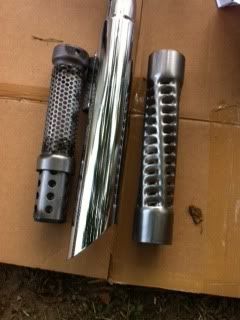
The original baffles are the ones on the right.  I've heard the Shortshots with the stock baffles and they are too LOUD for my taste. My ears would be bleeding through a tunnel or underpass. I decided to go with their quitter baffles instead, the ones on the left. Taking the baffles out wasn't difficult, I just used some vise grips to get a hold on the edge and tugged little by little.


The pipes have to be "assembled" out of the box, sounds scary but it's misleading.  These pipes just needed the sleeves to be slid over the actual pipes as shown in the pic. Everything went easily together with a bit of gentle pushing.  The sleeves are held on to the main pipes by 4 hose clamps.


Putting them on the bike was the easiest part, definitely doable alone. The only thing that needed a bit of tweaking was the sleeves, to get that "stacked" look at the tip.

Here's the end result.


Monday, January 30, 2012

Thanks for the messages, pipe mod

I've received a few more questions and messages about the 650 and I'd like to thank everyone who has visited the page so far.  


I never expected an extremely busy year, so I've really let the blog slide down. But soon, I'll be posting more stuff since I did get a chance to do more mods and maintenance upkeep like oil changes and other minor things. I switched to Vance and Hines pipes a few months ago so here's the video of it. I didn't get a chance to record the original pipes so hopefully you take my word on that it sounds a lot louder than stock.


Vance and Hines Shortshots


I'll be posting pics of how this mod went along in a few days. 

Thursday, June 2, 2011

Contacting Me

If you need to contact me and ask about the mods I've done or need some more clarification, you can e-mail me at rina1504@gmail.com or go to the www.vtwinmama.com forum and post in the message boards. It's an awesome site with other friendly riders offering advice on riding, maintenance, modifications, and just plain talking. Safe riding ;-)

Monday, January 17, 2011

Until February

I won't be able to do any mods on my bike for a few weeks due to moving so I'm just riding for the meantime.

Scootworks Phat Risers II

Barely flat footing the 650 can also mean barely reaching the handlebar. I notice I run out of arm room whenever I try to do some sharp or low speed turns. This is where the risers come into play. There were so many to choose from, I had a headache surfing through the web finding ones I liked. However, they all came in chrome. Barely any came in black that had the pullback I wanted, so I went with Scootworks Phat Risers II for a 2" increase in height and a 3" increase in pullback over the stock ones. The II's require the cables to be re-routed, the I's don't. I'm not sure if the III's will even fir the 650 but those would require new cables if they do.

Stock Risers


The instructions were straight forward, nothing confusing about them. I didn't follow the recommended tips though because I didn't have a bike jack to lift the front end. You have to do this to take pressure off the front end when removing the top triple tree. This would be the fasted way to re-route the cables. I was curious if I could do it a different way, without disconnecting any cables except the throttle. Well I did, and it was time consuming as hell and had me removing the throttle, brake, and headlight assemblies.


This post will be less detailed on each of the steps I took because it's just too long. I needed to use all my hands and I just wanted it done before the rain got heavy so less pics on this. Also, this one is not to be taken alone by anyone with only a very basic understanding of mechanics. It's possible, but I hope at this point you have an understanding of the proper ways to remove/start bolts, preventing stripped bolts, using a torque wrench, the proper way to evenly tighten bolts on an assembly, etc.


In whatever way you're going to approach changing out your stock risers with a required cable re-route, cutting off all the plastic ties holding the cables before anything else makes life so much easier.

Before taking off the risers, I covered the gas tank with a towel, took the headlamp mounting bolts off and covered the headlamp with an old shirt. I also removed the mirrors to make the handlebar lighter. With a screwdriver, I removed the two screws holding the throttle assembly together and removed the grip from the handlebar. Using a 5 mm allen key, I removed the brake assembly but left the brake lever attached. With 10" bolt cutters, I snipped of parts of the wiring bracket mounted underneath the top triple tree holding the brake, clutch, and throttle cables in place. I didn't need them with the new risers as the cables will lose their slack. I put the two assemblies through the triple trees. I had to push the headlamp away a bit for both pass through.


You can disconnect the throttle from either end, at the lever or at the crankcase. I did it at the crankcase, I didn't want to mess with the handle since I had already adjusted it a few times when I installed the Clevver. Disconnecting it from the crankcase, I just took the adjusting nuts off and slid the throttle cable out of the metal holder.

Comparison


After all that, then I removed the stock risers and let the handlebar rest on the gas tank. I installed it according to directions on the package and then put the handlebar on. I tightened it just enough to hold it in place and I connected everything back to the handlebar. I routed the throttle cable behind the triple trees and connected it back to the crankcase. Sounds simple, but since I was working alone, I had to keep re-positioning things so they wouldn't fall or scratch anything which was very time-consuming.


The 3" pullback helps out a lot. I can now bend my elbows and with the handlebar sitting higher, it takes a lot of stress of my shoulders. This is important for me because an old work accident a couple of years ago now makes my left shoulder muscles cramp at particular positions. It's not painful, just feels odd and nagging. I guess if you're cutting the 5'0 height like I am, the II's are the way to go. Someone taller than that can probably manage with the I's and no cable re-routing.

Before and After pics to show the difference:

Stock:


Scootworks Phat Risers II
 

Sunday, January 9, 2011

Battery Tender Jr.

The most practical mod or addition I've done is hooking up a Battery Tender Jr. to my 650. This should have been the first thing I thought of but I had no idea how quick a motorcycle battery loses potential in just a few days. For around $30 at the auto store, it's paid for itself over and over in just a few short weeks.

It took about 10 minutes to install using a Phillips screwdriver and a 5mm allen key. Don't be too gentle when taking off the cover, that right side needs a solid tug to take off.


Make sure to remove any rings, bracelets, and other accessories from your hands before working near the battery. Familiarize yourself and follow all electrical safety precautions.

Loosen the strap by pulling it downwards then towards you, that should clear the D-Ring at the end from the plastic tab it's hooked to. Take off the two visible wiring connectors by pulling it off carefully from the plastic tabs. Bend the plastic battery cover away from the battery.

Here's how I was taught in Navy "A" school about disconnecting batteries: "Red socks, black boots, which one can you take off first?". Disconnect the black negative cable using a Phillips screwdriver with an insulated handle. Even though the cable is not a threat once it's off, as good practice treat it like a live cable and make sure it doesn't contact any metal pieces. Disconnect the red positive cable from the battery. Treat it like a live cable as well. Take the Battery Tender wire with the red end and insert it over the red cable, then re-connect to the positive terminal. Do the same with the black end over the negative cable. Start threading the screws by hand if you can, that way you are less likely to contact the frame with the screwdriver and make a complete circuit (fry your battery). The upside is there aren't very many metal pieces around the battery compartment to do this with, the 650 Custom is a plastic master piece in this regard.     


After taking off the seat, I used two black zip ties to secure the wires under the seat and around the shock. This placed the cables out of the way and I was able tuck them discreetly over the storage compartment or inside it.


Before putting the battery cover back on, you might want to start your bike to make sure you didn't disconnect anything or if you did, that you remembered to re-connect them.


Test out the Battery Tender Jr. by following instructions in the package (plug it in, make sure the light is red = charging). Put the covers back together once you're satisfied everything works properly.


An added benefit is that it comes with jumper cables. You don't need to take off your battery cover when you need to jump start your bike. Just simply hook up the cables the same way as the charger, make sure you keep the black and red clamps away from each other, if they touch you're in for a nice surprise. It also comes with a 7.5 amp fuse to protect your battery in case it's getting too much amps like if jump starting from a running car. It's also small enough to carry inside the compartment. For jump starting, "red socks, black boots" still applies.

UPDATE: Someone kindly pointed out that the cables are switched at this point.  If you use the cables, red will actually be ground.  Also, the jumper cables should probably only be used when using a battery with a similar rating (jump starting from another motorcycle).  If using a car battery, use regular jumper cables for the car.  

Now, just plug it in and charge.

Wednesday, January 5, 2011

West Eagle Solo Seat for V Star Custom 650

Since I already took the pillion seat out the day I got the bike, I only needed a 5 mm allen key to take the stock seat out. If you still have the pillion, you can remove it by taking off the nut at the very back of the seat. That's the only thing holding it in place.


650 owners have often voiced their disdain about how the stock seat makes them feel like they're riding on top of the bike instead of the much coveted "in the saddle feel". This seat definitely delivers on that whim. It is so much thinner than the stock, but quite more comfortable.


It truly takes out a lot of the excess padding where I wasn't too crazy about, the sides. With a shortened width and a thinner base, this is what comes into play for reducing the seat height. It didn't really lower it as much as I wanted, but I haven't been able to test ride it yet due to ice conditions. I'll update once I take it for a spin and write about the comfort factor.

For being priced so closely, a stock seat replacement is $149.87 with the West Eagle one at $159, this seat is miles ahead on quality. It's riveted at the bottom instead of stapled and has a steel base instead of fiberglass or plastic.


Sitting on it, the high end back provides a nice lumbar support, very comfortable on the lower back. This might come in handy on long trips when I want to lean back a little.

You can truly appreciate the slimming effect it has on the sides with this view. I'd say it probably took off about close to an inch for seat height.


The only downside I can see with this seat it is doesn't do a thing for my handlebar reach. It actually might have decreased it, but I was already coming up short even on the stock seat. That should take me to my next mod which will be to add some risers.

Stock Seat


West Eagle Solo Seat


Monday, January 3, 2011

Another for the Clutch - Clevver Mod

The Seritec clutch mod works great but halfway through the test ride my left hand kept cramping. It wasn't always a problem but because of playing classical guitar, the cramps have gotten worse over the years. Having tiny hands also makes it harder to manipulate the clutch at low speeds. I heard about the Clevver and how it reduces the pulling effort for the clutch. Gave it a try and it's definitely worthwhile. Here's the view from underneath the clutch handle.


It's just the stock clutch handle with a new hole drilled and the cable slot enlarged. Again, if you want to save money, you can attempt to do this mod with your stock clutch and a reliable drill with good bits. $40 is all right for having the precise measurements and drilling done. Would be safer to do with a bench drill since it does require the hole to be straight.

I had to file the housing down to accept the new lever because if you look at the pic, the new position of the cable end has to pass over the edge of the housing. It's 1/16" too thick to clear the edge hence the slight filing. Models before '09 might not encounter this problem, mine's the only one I've seen with this minor change.

I had to back out the clutch lever adjusting nut almost all the way out just to ensure the clutch is fully disengaged when I pull on the lever. You can tell if you're clutch is not fully disengaging by testing it out:

With the engine running and the bike in neutral, put up the side stand and duck walk the bike carefully. If it's smooth, then carefully shift it to first. You shouldn't feel a sudden lurch. Still in first with the clutch lever pulled in, you should be able to smoothly walk it out like in neutral.

If in neutral there's a drag to the bike when you push it, adjust it before you test it out in first, the clutch is not fully disengaging.

I didn't just do this test in my driveway. After adjusting it properly, I rode it in a safe area for a little bit, did some upshifts and downshifts. After it warmed up, the cable felt a bit looser and I had to do some more adjustments.

This is probably why Yamaha limited the range of clutch adjustments to just the lever free play. An improperly adjusted clutch cable will burn out your clutch faster and it's definitely not safe especially when shifting out of neutral.

Combined with the Seritec mod, it's now possible to adjust the friction zone beyond the clutch lever pulled all the way in. That's why it's important to test it out and tweak it. I had to adjust both ends, the lever adjusting nut as well as the crankcase adjustment by the seritec addition. As well as the clutch fully disengaging when you pull it in, it should also fully engage when the lever is all the way out.

On a note, with both mods installed, my clutch lever doesn't go back out to what used to be the fully engaged position past the free play. At regular operation, it just stops where the free play is supposed to start, but it's already fully engaged. This is because of the new angle the cable takes with the clevver. The free play zone is now more of a "dead" zone. If anyone else has notice this, tell me about because I'm curious as how it acts in different models.

Overall, it did reduce the pull effort significantly and gave me a wider range for the friction zone. Tested it out with u-turn and figure 8's and had vastly improved control with no hand cramping. It becomes more forgiving, plus I only need to release the clutch lever by an inch to get into that sweet spot for tight u turns with a slight throttle and brake control. Hill starts were much easier. If you had problems stopping and taking off on an incline or even just at stop signs, this will ease the pain. Especially for guitar players.

Sunday, January 2, 2011

Seritec Clutch Mod

Here's what I was talking about with the clutch. This was the first modification I did to increase the bike's elusive friction zone.


I know it's just a metal tube with a spring inside it, something that you can do yourself for a under $5. The make-it-yourself and DIY mod can be found in 650 Custom, Chopper, and Dragstar site in their How-To section.

I went with the pre-made kit from Seritec. Since I'm a bit lazy to test out different tube sizes and to find the right spring length, $14 isn't a bad price to pay someone for the parts and the labor in testing to find the right specs. E-mail Roger at seritc@aol.com for questions about it. He sells them on eBay, but if you e-mail him he sells them at a lower rate. No problems with shipping either.


The illustrated instructions are very clear and easy to use, I only needed a 12mm combo wrench. Depending on the year model, you might need some long nose pliers to take the cable end out of its housing by bending the little metal tab blocking it in. Increasing the free play from the lever end (backing the nut and adjusting bolt in toward the lever) gave me all the slack I needed to do this. All the work was done at the crankcase end.

I had absolutely no problems with this mod and it did what it was advertised to do. Rode for about 20 miles to test it out and it's solid. The friction zone now started at roughly about 1 1/2" away from the handlebar grip.


Although I'm thinking this probably voids the warranty somehow. Just take it off when you take it to the dealer if in question.

Basic Tools to Get Started

If you open up the black case underneath the seat on the kickstand side you'll find a handy compartment with a set of tools. Or hopefully they're there. If you have a used bike, chances are the original owners lost them. Here's what should be inside that tool kit


We'll get to more of those tools later down the road when I get a chance to use them. For now, I prefer a basic tool set like this which I keep in the shed.


Unless you can afford to buy new tools or must have shiny new ones, get them used at pawnshops or see if anyone you know is cleaning out their garage. My friends are always throwing out perfectly good ones because they're "old" or they've found better ones. The day after Father's Day is a good time to check out craigslist for tools and tool boxes.

The things I consider for a started set:
1. Make sure the tools are metric sizes, measured in mm, since it's a Japanese bike.

2. Getting 6-point sockets instead of 12-point, better grip on the bolts and a lesser chance of stripping the bolt heads when your tightening them down.

3. If buying used, make sure your sockets match up with your ratchet drive.

4. Buying new, try to get them in sets since it's always cheaper.


Here are other tools and items worth keeping under the seat for emergencies or checks.


The jumper cables are from the Battery Tender Jr pack which I installed on the bike. Everything else I've already had from maintaining my car.